The web form editor is used to construct custom web forms. You can access this editor by clicking the “create web form” button on the Editor toolbar.
To create a web form
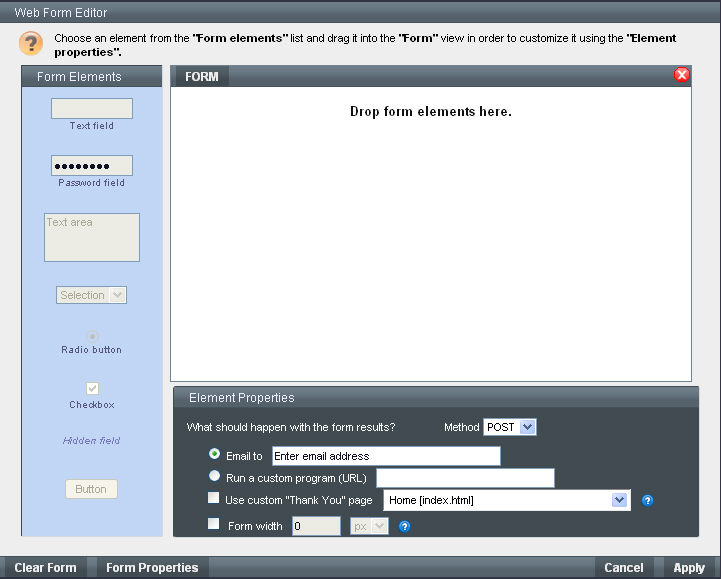
• First, select an element from the Inputs menu on the left, and drag it to the Form window on the right.
• Continue dragging the elements over, in the order in which you want them to appear. You can delete an element placed in the Form window by clicking one of the red “close” icons to the right of the element.
Don’t forget to add a button; this will be used to submit form data.
• Next, assign labels to each form element. You can do this by clicking on the tags which say “click text to edit”. These are the labels which will appear beside each form element in your web page.
• When all elements have been named to your satisfaction, click on each element in the form; you will notice that at the bottom of the screen, additional information concerning each form element is displayed (see explanation of form properties below for further details). Modify any of these properties to suit your needs.
• Click on the “FORM” label at the top the form you have created.
Specify the email address, or the URL of custom web code, which should be used when a form is filled in and submitted.
• When you are finished, click “apply” to insert your form into you page.
• To change the location of the form, click and drag on any of the element labels (the entire form will move)
Note: If you want to manually adjust the width of your form you may do so by entering a value in pixels or percentage.
• Click the check box next to “Form width”.
• Enter a value
• Choose “pixels” or “percentage” from the drop-down menu located next to the value field.
• Click “Apply” to save the changes made.
You can create your own "Thank You" page and modify its content, using Menu Editor (Manage Pages >"Create Page" and "Edit Page Content" buttons). Select the page from the drop-down menu in the Form Editor to link to it after Form is submitted.
To modify a web form
To modify an existing web form, double-click on one of the form element labels to the left of the form. Your form will be opened in the web form editor.
Explanation of form properties
The following form element properties can be modified:
|
Property |
Applies To |
Explanation |
|
Name |
All elements |
This is the name used to refer to the element when form data is emailed. |
|
Value |
All elements |
This is the default value of the element, before the user has made any selections. For no default value, leave this property blank. Note: for buttons, this property is used for the button label. |
|
Checked |
Radio buttons, checkboxes |
This property can be set to YES or NO. It is used to determine if the radio button or checkbox is selected by default. |