The menu editor bar
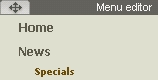
The menu editor allows you to modify your website's navigation bar (usually found at the left-hand side of your template). You can use the menu editor to add, remove or rename menu and submenu buttons. It is also possible to move the navigation bar to a different location on the template. Below is an example of what the navigation bar will look like in your EasySiteWizard Pro template:
To move your navigation bar, click and drag the menu editor bar at the top of the navigation menu.
Accessing and using the menu editor
To edit the buttons on your navigation bar, click once on "menu editor". The menu editor will appear (shown below)

To create a new button, click on "Create New Button", then type in the name and tooltip (optional). Using the "link to" options provided, navigation buttons can be linked to:
Other pages on your website
An external URL
An EasyBlogBuilder blog*
An EasyStoreMaker/EasyStoreMaker Pro store*
An EasyLiveChat system*
An email address (to send email)
* Requires configuration of applicable WebsiteOS application.
To create a new sub-menu button, click the "+" icon where you would like the item to appear.
To delete a button, first click on it to see its detail panel (shown above on the right-hand side). When the detail panel opens click on "Delete this button".
To modify a button, click it to see it's detail panel. From there you can easily rename the button, add a tooltip, or change where the button links to.
To rearrange buttons, simply drag them to their desired location.